Since one of the aspirations I have for this site is learning via blogging/documentation (and get in a better habit of documenting steps in real IT projects, something I have NOT fared well with maintaining our own internal Wiki as well as I have liked), the first machine that I will create (outside of Punisher, which I needed for DNS to run the show). Since I run my virtual machines off of either NFS or iSCSI on Phoenix (my storage server), I will create a an iSCSI target for this machine (50GB) and attach it to my ESXi hypervisor (Deadpool). The reason I am attaching to Deadpool and not my KVM hypervisors is that they draw more power (Dell R510s vs a 1U homegrown machine with a 200W PSU) and the current heatwave does not have my wife in a good mood. So unfortunately for now it will be managed on a Windows machine (although down the road I will go into how to move images from ESXi and install them in KVM and vice-versa).
Here are the steps I hope to accomplish with this installation:
- Browse the Phoenix file structure to determine how much room we have in the storage structure
- Create an iSCSI target within the Phoenix file structure
- Add the iSCSI target to the Deadpool datastores
- Create a new machine on our Deadpool hypervisor, and boot using the RHEL 6.4 DVD
- Install the workstation to the Phoenix storage share
- Bootup and start going through Michael Jang’s RHCSA/RHCE 6th edition book for some of the exercises
Please keep in mind that some of the text output here is rather long, so makes for a long webpage. I figure better to include and have the reader skip the parts they don’t need, and keep all the relevant output for those who prefer to look more closely or are unfamiliar with the commands or outputs.
Creating a Logical Volume on Phoenix
Phoenix is our Dell R510 storage server. How it is formatted and setup can be found here. What we will do is check the physical groups, volume groups, and logical volumes to see how much space we have. First, we check how much physical space we have left in our physical volumes:
[root@Phoenix ~]# pvdisplay
  --- Physical volume ---
  PV Name               /dev/sdc1
  VG Name               vg_iscsi_share
  PV Size               3.64 TiB / not usable 2.00 MiB
  Allocatable           yes
  PE Size               4.00 MiB
  Total PE              953599
  Free PE               933119
  Allocated PE          20480
  PV UUID               ZLl2Lk-UUGs-kN01-F5aJ-ojOY-5K7P-xGVG0V

  --- Physical volume ---
  PV Name               /dev/sdb1
  VG Name               vg_nfs_share
  PV Size               4.00 TiB / not usable 2.00 MiB
  Allocatable           yes
  PE Size               4.00 MiB
  Total PE              1048255
  Free PE               776895
  Allocated PE          271360
  PV UUID               1X64E0-EzNr-b5C3-xGZF-ZiiI-LF9J-OROHS9

  --- Physical volume ---
  PV Name               /dev/sda2
  VG Name               vg_phoenix
  PV Size               148.01 GiB / not usable 3.00 MiB
  Allocatable           yes (but full)
  PE Size               4.00 MiB
  Total PE              37890
  Free PE               0
  Allocated PE          37890
  PV UUID               lZfjXC-eBr6-YBr2-Fpyb-PqqI-NZDC-NruscD
This will give us a list of of our physical volumes. The values can somewhat tough to read, so there is a shortcut way to look at remaining physical space:
[root@Phoenix ~]# pvdisplay -s
  Device "/dev/sdc1" has a capacity of 3.56 TiB
  Device "/dev/sdb1" has a capacity of 2.96 TiB
  Device "/dev/sda2" has a capacity of 0
This will let you know the remaining actual space, instead of how many physical extents. We have the most room in /dev/sdc1, which we have dedicated to iSCSI targets in our original config with Phoenix.
So now let’s take a look at our volume groups (our setup is straightforward in Phoenix; /dev/sdb1 is assigned to volume group vg_nfs_share, and /dev/sdc1 is assigned to volume group vg_iscsi_share). Volume groups can be used to span multiple physical volumes (for example, you can create one large volume group that spans both /dev/sdb1 and /dev/sdc1 instead of assigning one to one like we did).
Let’s take a look at our volume groups:
[root@Phoenix ~]# vgdisplay
  --- Volume group ---
  VG Name               vg_iscsi_share
  System ID
  Format                lvm2
  Metadata Areas        1
  Metadata Sequence No  2
  VG Access             read/write
  VG Status             resizable
  MAX LV                0
  Cur LV                1
  Open LV               1
  Max PV                0
  Cur PV                1
  Act PV                1
  VG Size               3.64 TiB
  PE Size               4.00 MiB
  Total PE              953599
  Alloc PE / Size       20480 / 80.00 GiB
  Free  PE / Size       933119 / 3.56 TiB
  VG UUID               BXI7au-oYaN-421j-4gwm-eZbJ-jLF6-fyruiw

  --- Volume group ---
  VG Name               vg_nfs_share
  System ID
  Format                lvm2
  Metadata Areas        1
  Metadata Sequence No  6
  VG Access             read/write
  VG Status             resizable
  MAX LV                0
  Cur LV                2
  Open LV               2
  Max PV                0
  Cur PV                1
  Act PV                1
  VG Size               4.00 TiB
  PE Size               4.00 MiB
  Total PE              1048255
  Alloc PE / Size       271360 / 1.04 TiB
  Free  PE / Size       776895 / 2.96 TiB
  VG UUID               qmOUbt-ah9u-1GTJ-6PLV-wCcq-ZjE2-jUy81h

  --- Volume group ---
  VG Name               vg_phoenix
  System ID
  Format                lvm2
  Metadata Areas        1
  Metadata Sequence No  4
  VG Access             read/write
  VG Status             resizable
  MAX LV                0
  Cur LV                3
  Open LV               3
  Max PV                0
  Cur PV                1
  Act PV                1
  VG Size               148.01 GiB
  PE Size               4.00 MiB
  Total PE              37890
  Alloc PE / Size       37890 / 148.01 GiB
  Free  PE / Size       0 / 0
  VG UUID               wkuITy-zLQO-PhhY-lsBQ-rCGj-zA32-d4p3vh
Looks pretty close to the pvdisplay above; except this is tied in directly to the volume groups (this is where we can create logical volumes; they cannot be created in physical volumes). As above, you can take a shortcut to see how much space you have left with the -s parameter:
[root@Phoenix ~]# vgdisplay -s
  "vg_iscsi_share" 3.64 TiB  [80.00 GiB used / 3.56 TiB free]
  "vg_nfs_share" 4.00 TiB  [1.04 TiB  used / 2.96 TiB free]
  "vg_phoenix" 148.01 GiB [148.01 GiB used / 0    free]
Since our setup was one-to-one between physical groups and volume groups this makes sense. The last step is to check our logical volumes (if for no other reason than to see what we have on the disk):
[root@Phoenix ~]# lvdisplay
  --- Logical volume ---
  LV Path                /dev/vg_iscsi_share/punisher
  LV Name                punisher
  VG Name                vg_iscsi_share
  LV UUID                LpUq0Q-Np0I-mtZ9-KURe-3kmg-unV0-GQ5agF
  LV Write Access        read/write
  LV Creation host, time Phoenix.storage, 2013-05-07 16:22:46 -0400
  LV Status              available
  # open                 1
  LV Size                80.00 GiB
  Current LE             20480
  Segments               1
  Allocation             inherit
  Read ahead sectors     auto
  - currently set to     256
  Block device           253:2

  --- Logical volume ---
  LV Path                /dev/vg_nfs_share/images
  LV Name                images
  VG Name                vg_nfs_share
  LV UUID                fpG4bP-p6qV-ZVLU-oK5G-61m2-og1x-8OQpLq
  LV Write Access        read/write
  LV Creation host, time Phoenix.storage, 2013-05-03 05:18:40 -0400
  LV Status              available
  # open                 1
  LV Size                1000.00 GiB
  Current LE             256000
  Segments               1
  Allocation             inherit
  Read ahead sectors     auto
  - currently set to     256
  Block device           253:3

  --- Logical volume ---
  LV Path                /dev/vg_nfs_share/ISO
  LV Name                ISO
  VG Name                vg_nfs_share
  LV UUID                t8vmYQ-x4Fl-005X-N0Ad-W1Co-Ate9-kOf53p
  LV Write Access        read/write
  LV Creation host, time Phoenix.storage, 2013-05-06 07:06:35 -0400
  LV Status              available
  # open                 1
  LV Size                60.00 GiB
  Current LE             15360
  Segments               1
  Allocation             inherit
  Read ahead sectors     auto
  - currently set to     256
  Block device           253:4

  --- Logical volume ---
  LV Path                /dev/vg_phoenix/lv_root
  LV Name                lv_root
  VG Name                vg_phoenix
  LV UUID                thRojf-0orC-DBYZ-NPI7-53rY-FL4W-Q29fvM
  LV Write Access        read/write
  LV Creation host, time Phoenix.storage, 2013-05-01 14:42:59 -0400
  LV Status              available
  # open                 1
  LV Size                128.48 GiB
  Current LE             32890
  Segments               1
  Allocation             inherit
  Read ahead sectors     auto
  - currently set to     256
  Block device           253:0

  --- Logical volume ---
  LV Path                /dev/vg_phoenix/lv_swap
  LV Name                lv_swap
  VG Name                vg_phoenix
  LV UUID                xgMw2z-afGg-jzXb-SzVs-sw1a-VDlc-efdjeb
  LV Write Access        read/write
  LV Creation host, time Phoenix.storage, 2013-05-01 14:43:24 -0400
  LV Status              available
  # open                 1
  LV Size                7.81 GiB
  Current LE             2000
  Segments               1
  Allocation             inherit
  Read ahead sectors     auto
  - currently set to     256
  Block device           253:1

  --- Logical volume ---
  LV Path                /dev/vg_phoenix/lv_home
  LV Name                lv_home
  VG Name                vg_phoenix
  LV UUID                oSJvv8-nX1M-esPL-qzHG-J5o4-bbS5-36sggF
  LV Write Access        read/write
  LV Creation host, time Phoenix.storage, 2013-05-01 14:43:25 -0400
  LV Status              available
  # open                 1
  LV Size                11.72 GiB
  Current LE             3000
  Segments               1
  Allocation             inherit
  Read ahead sectors     auto
  - currently set to     256
  Block device           253:5
Anything above with vg_phoenix is from the original LVM create when installing the OS. That portion is for the OS only. So the only logical volumes in use (that we have created specifically for our KVM/ESXi environment) are:
root@Phoenix ~]# lvdisplay
  --- Logical volume ---
  LV Path                /dev/vg_iscsi_share/punisher
  LV Name                punisher
  VG Name                vg_iscsi_share
  LV UUID                LpUq0Q-Np0I-mtZ9-KURe-3kmg-unV0-GQ5agF
  LV Write Access        read/write
  LV Creation host, time Phoenix.storage, 2013-05-07 16:22:46 -0400
  LV Status              available
  # open                 1
  LV Size                80.00 GiB
  Current LE             20480
  Segments               1
  Allocation             inherit
  Read ahead sectors     auto
  - currently set to     256
  Block device           253:2

  --- Logical volume ---
  LV Path                /dev/vg_nfs_share/images
  LV Name                images
  VG Name                vg_nfs_share
  LV UUID                fpG4bP-p6qV-ZVLU-oK5G-61m2-og1x-8OQpLq
  LV Write Access        read/write
  LV Creation host, time Phoenix.storage, 2013-05-03 05:18:40 -0400
  LV Status              available
  # open                 1
  LV Size                1000.00 GiB
  Current LE             256000
  Segments               1
  Allocation             inherit
  Read ahead sectors     auto
  - currently set to     256
  Block device           253:3

  --- Logical volume ---
  LV Path                /dev/vg_nfs_share/ISO
  LV Name                ISO
  VG Name                vg_nfs_share
  LV UUID                t8vmYQ-x4Fl-005X-N0Ad-W1Co-Ate9-kOf53p
  LV Write Access        read/write
  LV Creation host, time Phoenix.storage, 2013-05-06 07:06:35 -0400
  LV Status              available
  # open                 1
  LV Size                60.00 GiB
  Current LE             15360
  Segments               1
  Allocation             inherit
  Read ahead sectors     auto
  - currently set to     256
  Block device           253:4
Broken down deeper, these volumes are:
/dev/vg_iscsi_share/punisher ### The iSCSI target created for our Punisher Windows 2012 DNS server
/dev/vg_nfs_share/images     ### The principal NFS share created to store KVM and ESXi disk images
/dev/vg_nfs_share/ISO        ### An NFS share created to keep our ISO images when creating new machines
Since an iSCSI target requires either a disk, file, partition, or logical volume, we will create a logical volume (to not waste an entire partition). We will use a 50GB partition:
[root@Phoenix ~]# lvcreate -L 50G -n blackwidow vg_iscsi_share
  Logical volume "blackwidow" created
The command breaks down to “create a volume that is 50GB with name blackwidow inside volume group vg_iscsi_share”
Create a new iSCSI target for Black Widow
First, let’s take a look and see what iSCSI targets we have (so we know what LUN [Logical Unit Number] to use):
[root@Phoenix ~]# tgtadm --mode target --op show
Target 1: iqn.2013-05.lab.home:storage.punisher
    System information:
        Driver: iscsi
        State: ready
    I_T nexus information:
        I_T nexus: 3
            Initiator: iqn.1998-01.com.vmware:localhost-62d21772
            Connection: 0
                IP Address: 10.0.0.5
    LUN information:
        LUN: 0
            Type: controller
            SCSI ID: IET     00010000
            SCSI SN: beaf10
            Size: 0 MB, Block size: 1
            Online: Yes
            Removable media: No
            Prevent removal: No
            Readonly: No
            Backing store type: null
            Backing store path: None
            Backing store flags:
        LUN: 1
            Type: disk
            SCSI ID: IET     00010001
            SCSI SN: beaf11
            Size: 85899 MB, Block size: 512
            Online: Yes
            Removable media: No
            Prevent removal: No
            Readonly: No
            Backing store type: rdwr
            Backing store path: /dev/vg_iscsi_share/punisher
            Backing store flags:
    Account information:
    ACL information:
        10.0.0.0/24
So we can see that LUN 0 (default) and LUN 1 (Punisher) are in use. So we will create a new target (tid #2) and still use LUN #1 in target 2:
[root@Phoenix ~]# tgtadm --lld iscsi --mode target --op new --tid=2 --targetname iqn.2013-07.lab.home:storage.blackwidow
[root@Phoenix ~]# tgtadm --lld iscsi --mode logicalunit --op new --tid 2 --lun 1 -b /dev/vg_iscsi_share/blackwidow
The last step is to add permissions to the share (either creating a tgtd username and password, and assigning to the target, or permitting a range of IPs to attach. This is what we will use as this is a trusted network):
[root@Phoenix ~]# tgtadm --lld iscsi --mode target --op bind --tid 2 -I 10.0.0.0/24
This will permit any initiator asking for this disk on the 10.0.0.0 subnet automatically. This is fine for a small setup, but for larger or heterogenous networks, the CHAP method may be a better bet. Now if we do a tgtadm list we get in addition to the top list:
Target 2: iqn.2013-07.lab.home:storage.blackwidow
    System information:
        Driver: iscsi
        State: ready
    I_T nexus information:
    LUN information:
        LUN: 0
            Type: controller
            SCSI ID: IET     00020000
            SCSI SN: beaf20
            Size: 0 MB, Block size: 1
            Online: Yes
            Removable media: No
            Prevent removal: No
            Readonly: No
            Backing store type: null
            Backing store path: None
            Backing store flags:
        LUN: 1
            Type: disk
            SCSI ID: IET     00020001
            SCSI SN: beaf21
            Size: 53687 MB, Block size: 512
            Online: Yes
            Removable media: No
            Prevent removal: No
            Readonly: No
            Backing store type: rdwr
            Backing store path: /dev/vg_iscsi_share/blackwidow
            Backing store flags:
    Account information:
    ACL information:
        10.0.0.0/24
Now that ACL is added to the the target and we can connect.
Create a Datastore for the iSCSI target we created
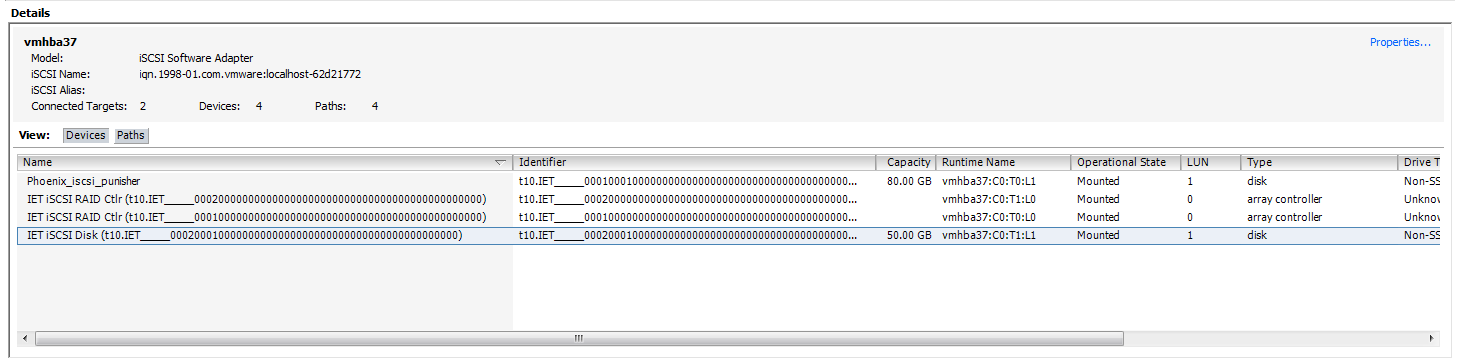
Before we can connect to an iSCSI disk in ESXi, we must first add the iSCSI target we just created to the datastores for VMWare. To do this, goto Configuration ~> Storage Adapters, and run the Rescan All command. This can take a while if you have a lot of targets, but usually comes back fast. The initial connection will be an unwieldy long ID, but you can tell which one it is by both its size (it’s 50GB, like we create) and also if you look at the Runtime Name, it’s the next higher target number (T1, as T0 is the first one for Punisher).
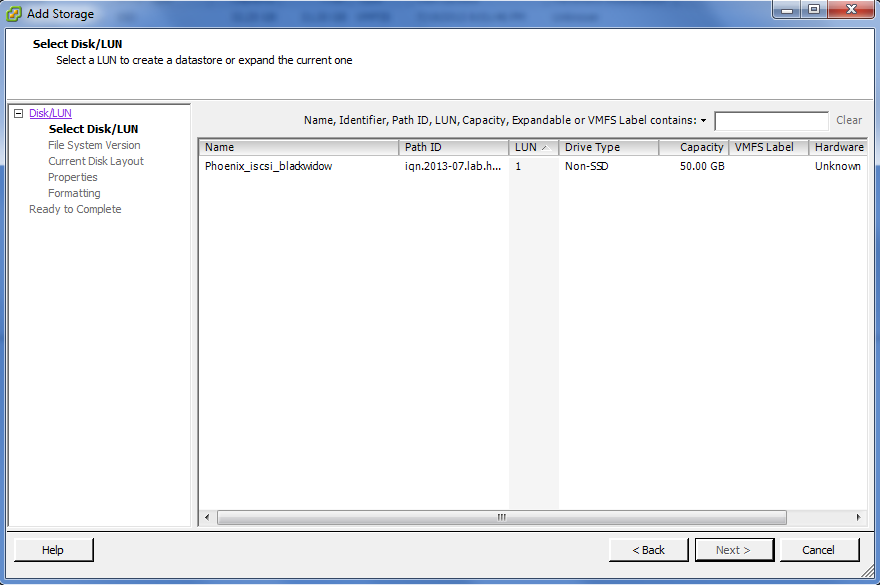
Here I just right-click the name, and change it to Phoenix_iscsi_blackwidow to follow convention. In ESXi, before you can use the target, you have to add it to the datastores. Goto Configuration ~> Storage, and then click Add Storage. Select Disk/LUN (as that is how iSCSI presents itself) and select the blackwidow disk we just added.
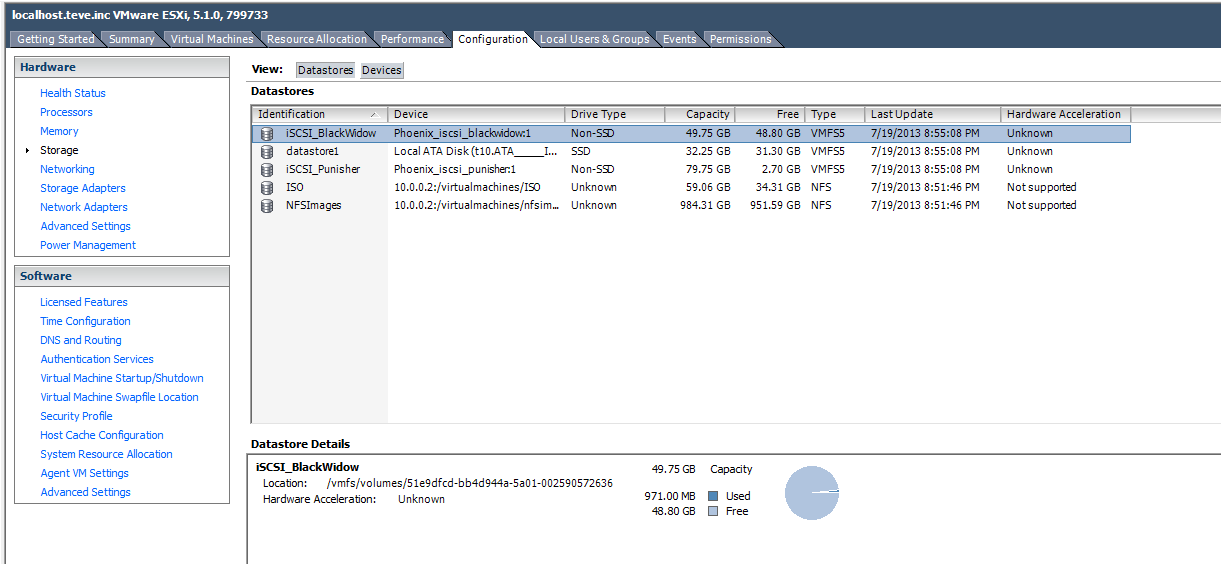
In the datastore, I renamed it to match the Punisher convention. Now we can create a new machine, and use the iSCSI target we just created.
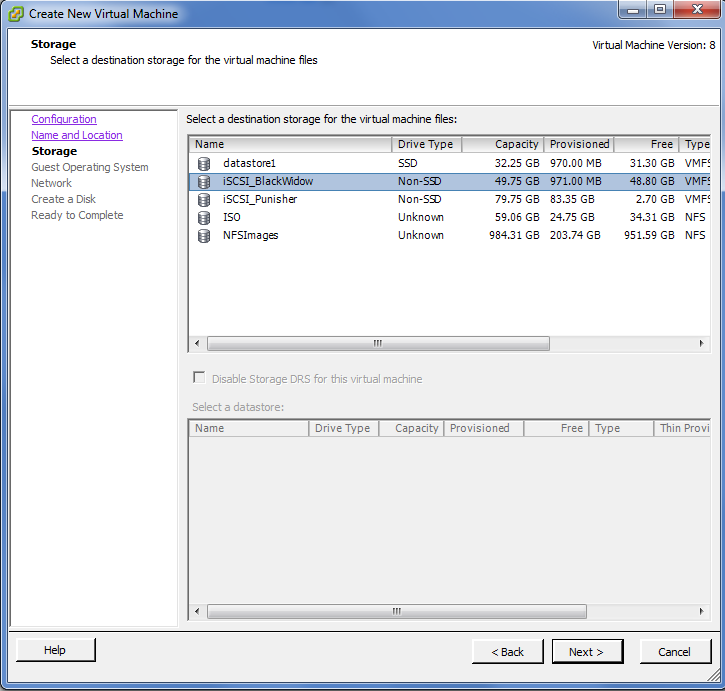
Create Black Widow virtual machine
Creating the actual machine is the easy part, this is effectively next-ing your way through. Just remember to select the proper disk in the datastore.

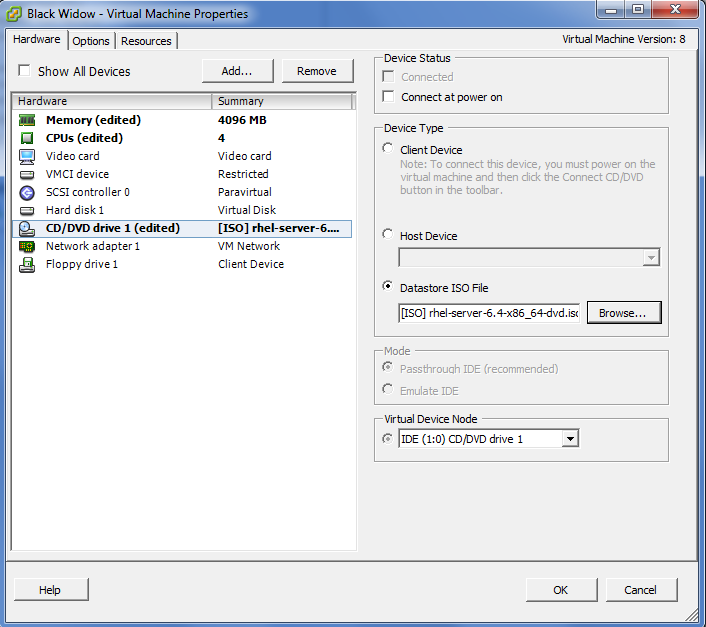
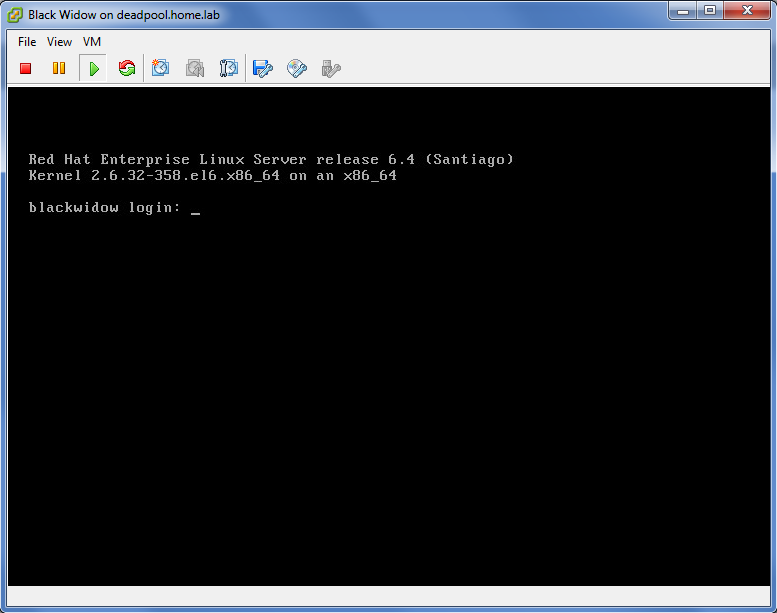
And voila! Just next your way through the installer (I go base install for my machine as I want to install all the packages and see what nuances I run into) and you should be up and running on your freshly minted iSCSI target!